DIY Draped Waistcoat (Zara-Inspired)
I have another sewing project to share today. I made it the same weekend that I made my sleeveless turtleneck dress.
I saw this amazing waistcoat from Zara last year but couldn't justify the $200 price tag so I got over it and moved on with life. But, recently while perusing Pinterest for camel-colored outerwear, I saw a pin from the Brooklyn Blonde sporting the infamous waistcoat and my love was revived.
If I couldn't justify the $200 price tag last year, I certainly couldn't justify the $400+ asking price on eBay so I decided to make my own. I took a jaunt over to JoAnn Fabrics to see what they had on offer and I found a really pretty camel-colored flannel that I knew I wanted to use. The original coat is a thicker woolen-looking material, but because it's so drapey, I think almost any fabric will work. Luckily, the sold flannels are about $3 per yard so it was definitely much more budget-friendly.
 You'll need:
3 yards of camel-colored flannel
matching thread
fabric chalk or disappearing ink pen
scissors
sewing machine
 Again, flannel is a great beginner's fabric because though it does fray along the cut ends, the fraying looks rather purposeful and pretty. Plus, it's basically double-sided so it doesn't really need to be lined.
Again, I don't have an actual official pattern to share because 1) I'm a sewing novice and 2) this is something that should be customized to your own body. But, I have the general shapes. You'll need two identical pieces to make up the back panel, two pieces to make up each front panel, a collar, and four pieces to make up two pockets.


 Start by sewing the two back panel pieces together. Cut out slits in each front panel for the pockets. Sew the pockets together and then turn them inside-out.
 Hem the armholes. Sew the pockets onto the insides of the front panels. Make sure you're sewing lining up the pockets properly so that when the jacket is on, you get the neat sewn edge on the outside.
 Place each front piece to the back panel (with the right sides touching each other) and then sew the shoulders and the sides together. Then, sew the collar to the waistcoat. Line up the center of the collar to the center of the back panel and sew along the neck, bypass the shoulders, and then sew the remaining sides of the collar to each front panel.
If you don't want any exposed hemmed edges, sew the collar backwards, meaning, you want the raw edges to be showing on the back of your neck when you're wearing the coat. But, I really like the way the edges are starting to fray (which you'll see in the photos below).
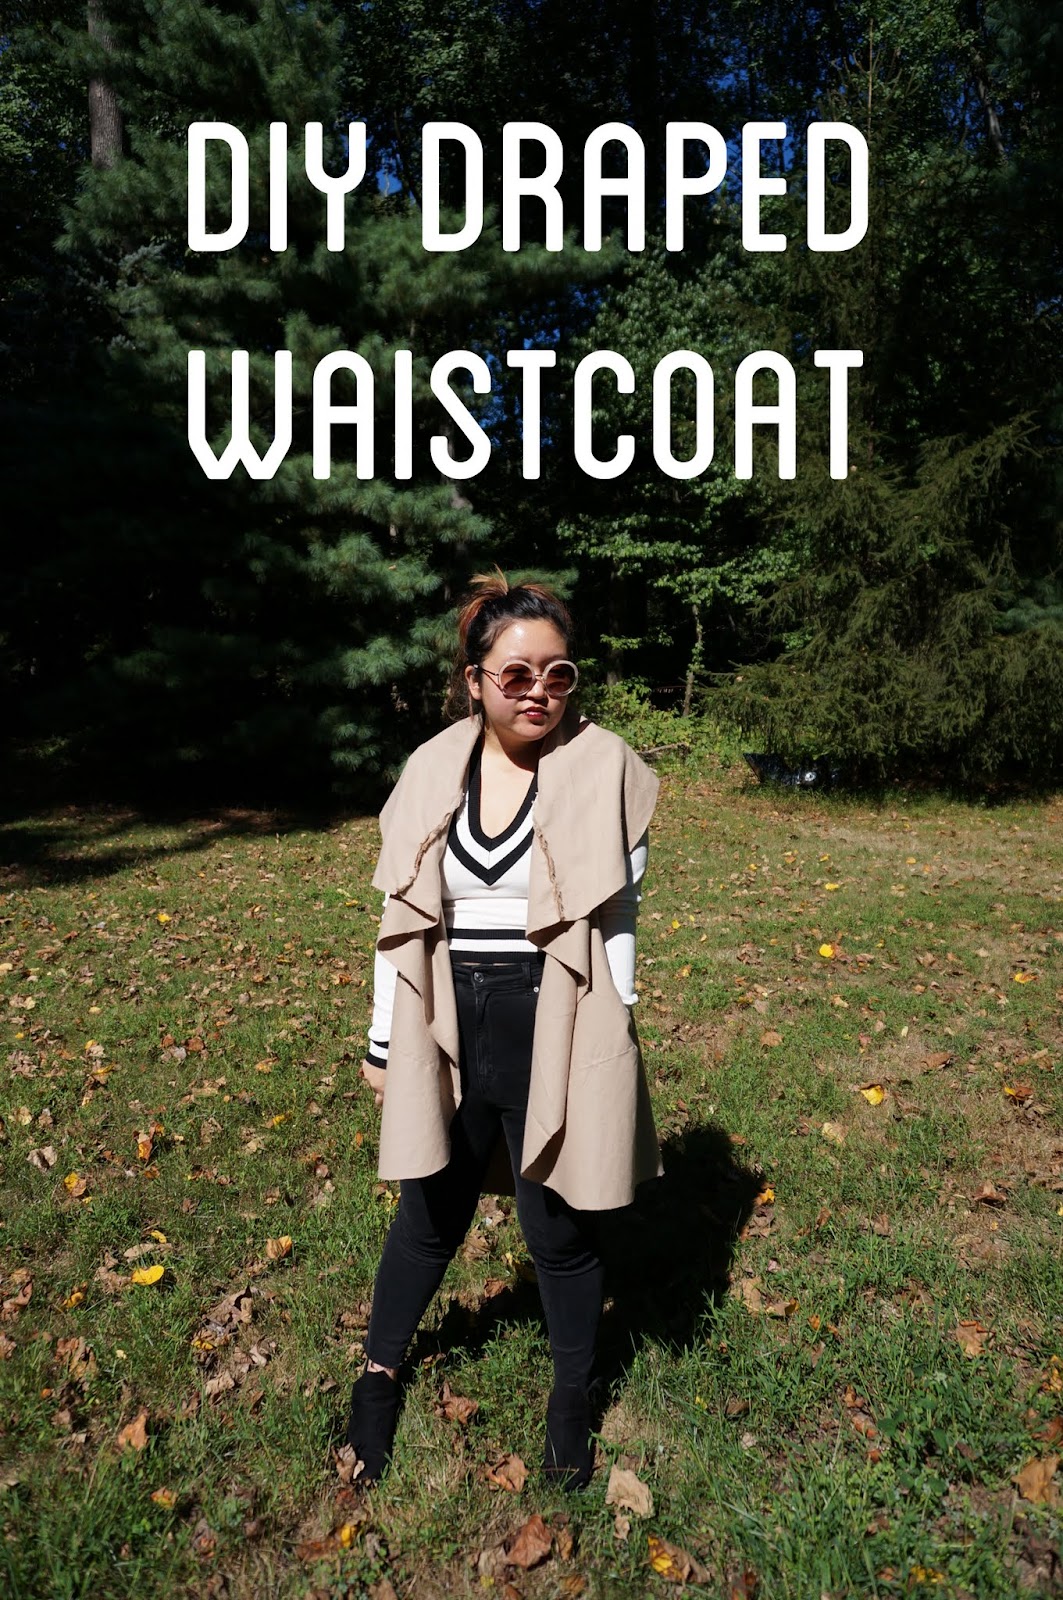
 And when it's done, it should fit nice and loosely like a lovely drapey coat. As always, I feel like I have to apologize for my awkward posing. I always feel supremely weird about showing off my creations in mini photoshoots; I'm not a model and cameras in my face make me feel weird. Also, I probably should have ironed the coat prior to the photoshoot but I was too lazy; sorry.

 I love that you can sort of close it up by wrapping it a little tighter or you can open up the panels and let it sit a bit more loosely.


 It's got sort of a trench coat style vibe but it's super casual and cute, or at least I think so. I'm seriously in love with this waistcoat so much and the best part is that it was much cheaper than the piece I was inspired by (probably by 97%).

 xoxo.
xoxo.
I saw this amazing waistcoat from Zara last year but couldn't justify the $200 price tag so I got over it and moved on with life. But, recently while perusing Pinterest for camel-colored outerwear, I saw a pin from the Brooklyn Blonde sporting the infamous waistcoat and my love was revived.
If I couldn't justify the $200 price tag last year, I certainly couldn't justify the $400+ asking price on eBay so I decided to make my own. I took a jaunt over to JoAnn Fabrics to see what they had on offer and I found a really pretty camel-colored flannel that I knew I wanted to use. The original coat is a thicker woolen-looking material, but because it's so drapey, I think almost any fabric will work. Luckily, the sold flannels are about $3 per yard so it was definitely much more budget-friendly.
3 yards of camel-colored flannel
matching thread
fabric chalk or disappearing ink pen
scissors
sewing machine

Again, I don't have an actual official pattern to share because 1) I'm a sewing novice and 2) this is something that should be customized to your own body. But, I have the general shapes. You'll need two identical pieces to make up the back panel, two pieces to make up each front panel, a collar, and four pieces to make up two pockets.


If you don't want any exposed hemmed edges, sew the collar backwards, meaning, you want the raw edges to be showing on the back of your neck when you're wearing the coat. But, I really like the way the edges are starting to fray (which you'll see in the photos below).

Comments
Post a Comment