DIY Thanksgiving Bunting
One week until Thanksgiving, my favorite holiday! We normally don't decorate for Thanksgiving but since our kitchen is brand new and this will be our first time entertaining since the renovation, I wanted to give it a little extra oomph.
 This is a really quick and simple craft and it's not a new concept but I'm sharing anyway.
You'll need:
thick colored paper
scissors or craft knife
ruler
glue
glitter
pencil
string
tiny clothespins
small command hooks
 Start by picking out the colors you want to use. I stuck with shades of orange to fit the Thanksgiving theme.
 Cut out triangles. I used a ruler to mark the halfway point on one of the sides and then drew lines from the opposite corners to the halfway point. Then, I just cut the triangles out using a knife and ruler to get smooth and perfectly straight lines.
 Repeat for as many triangles as you need.
 Draw letters on each triangle. I drew the letters freehand but you could always print some out in a font you like and trace them.
 I decided to use the phrase "thanks." Other phrases you could use: give thanks, thanksgiving, turkey day, thankful, gobble, feast, and that's all I've got.
 Trace your letters with a bit of craft glue and coat with glitter. Be generous but not too generous with the glue to make sure the glitter fills the entire letter. Let the flags dry for a few minutes.
 Pretty, right?
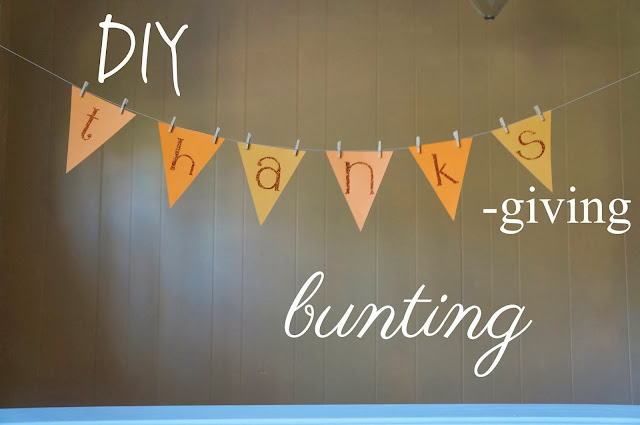
 To hang the bunting, use a pair of small command hooks and tie a string between them. I used a stretchy string (normally used for jewelry making), tied loops at each end, and hung the loops on the hooks. Then, hang up each individual flag using two tiny clothespins.
 Cute and festive, right?
 I took it a step farther and hung up some lantern lights too. Now we're all ready and decorated for Thanksgiving. Make your own bunting banner this weekend!
 Cheers.

You'll need:
thick colored paper
scissors or craft knife
ruler
glue
glitter
pencil
string
tiny clothespins
small command hooks


Comments
Post a Comment