DIY Bib Necklace
For the past few weeks, I have been occupying the chilly winter nights with DIY projects and today, I am sharing my "floating gem" bib necklace. Statement jewelry, especially embellished necklaces, are super trendy these days but personally, I am not a big fan of giving into trends. Not because I think I'm a cool hipster, but I'm not keen on spending money on something that may go out of style in a month. So making trendy things myself for a fraction of the cost is always a nice way to give in to the trends without breaking the bank.
 Start by creating a template with the cardstock (or in my case, brown bag). Take a sizable piece (one that's big enough for the necklace you are creating) and fold it in half so you can ensure your design is symmetrical. Cut out your pattern with scissors and unfold to reveal the shape.
 Next, cut out a piece of tulle (or mesh) that is large enough to cover the pattern. Glue a few corners down and use scissors to carefully cut out the tulle, tracing the cardstock pattern. Then, while the glue is still a bit tacky, peel the tulle off.
 Now for the fun part! Squeeze a small glob of glue out onto a piece of tin foil or plastic (I used the leftover plastic wrapping from my rhinestones). Place the tulle on top of the tissue paper (or wax paper). Using tweezers, dip the back of the rhinestones in the glue and place them on the tulle. Keep gluing until you have a pretty design. Make sure to leave a little space on the corners where you will attach ribbon.
 Next, peel the tissue paper off of the back of the necklace. Some of the paper will peel off easily but you may be left with small pieces of tissue on the backs of a few rhinestones. That is okay. Just peel around the edges and you won't be able to see it. Plus, the paper will provide reinforcement and prevent the rhinestone from falling off. Next, take two pieces of ribbon, which should be cut long enough that you can tie the necklace in a bow behind your neck and allow the necklace to dangle. Place a little glue on the ribbon - I used a velvet ribbon which was fuzzy on one side and dull on the other so I placed glue on the back (the dull side). Then glue the ribbon on TOP of the tulle.
 And here is my finished necklace. This is why I used tulle instead of felt: the tulle is almost undetectable so it just looks like the rhinestones are magically connected... or something. And the best part is that the total cost of the materials is about $15, but obviously, you can make multiple necklaces with that.
 And here are a few photos to show you what it looks like when I'm wearing the necklace. The resolution in these photos is not great, but doesn't it look pretty?

Also, since it's the holiday season, you may be trying to save a little money or you might be looking for a nice homemade gift for a friend, so hopefully this post will inspire you.
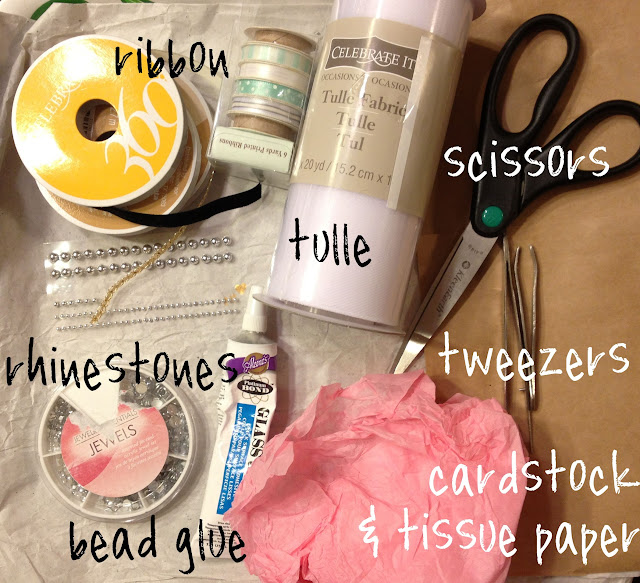
You will need:
ribbon ($2 to $3 depending on the type)
tulle or mesh ($4 for a 20 yard roll)
rhinestones, sequins, beads - your preference ($2 to $4 a pack, depending on the style)
bead glue ($3)
scissors
tweezers
cardstock or any thick paper (I used a brown paper grocery bag)
tissue paper or wax paper


Comments
Post a Comment