Happy 2 Year Anniversary To My Blog!
It's been two years of travel blogging for me, and of course I'm still motivated to travel but I'm actually kind of surprised that I've been motivated enough to post semi-regularly so hooray for me!
I have a few more Provo posts coming but in celebration of my two-year, here's a girly post on cupcake nails.
You'll need:
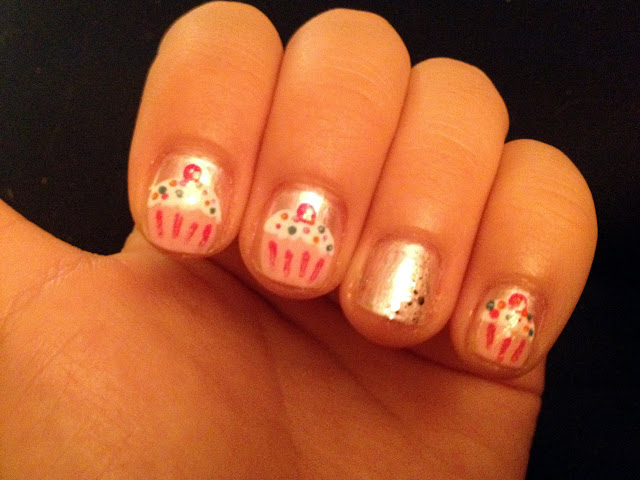
 These are my sister's hands. I chose to skip a few fingers and just put some glitter on them, left some plain, and put just a cherry on one finger. I used Essie's Oui Madame, which is a pearly white, for the base color. I think the pearly background looks great with the matte/opaque colors of the cupcake.

I have a few more Provo posts coming but in celebration of my two-year, here's a girly post on cupcake nails.
You'll need:
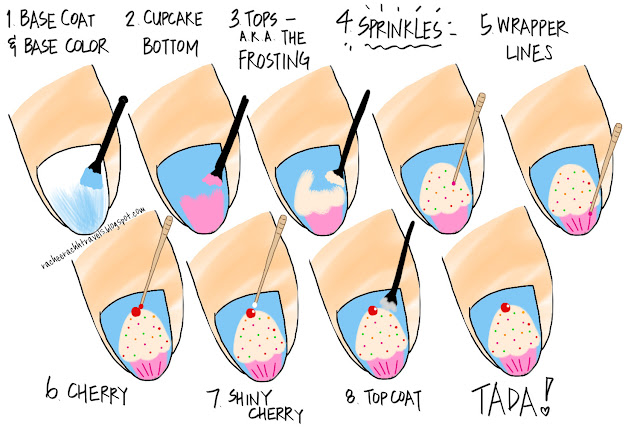
- base coat & top coat (DUH)
- base color - pick something neutral so that the cupcakes will stand out
- a color for the cupcake bottoms and a second polish in the same color family for the wrapper lines - bubblegum-ish pink is a classic cupcake bottom color and a darker pink would be perfect for the wrapper lines
- a color for the cupcake top - I like white because it makes the sprinkles pop
- two or three colors for the sprinkles
- red for the cherry
- white for the highlight on the cherry
- toothpicks for the tiny details
I made a little pictorial tutorial to demonstrate the process, since I only took finished nail photos.


Comments
Post a Comment